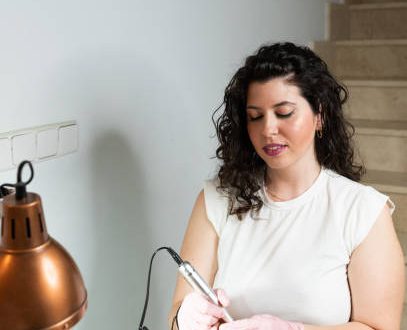
In the evolving world of personal grooming, the transition from professional salon visits to high-quality DIY home care has become a significant trend. At the heart of this revolution is the electric nail drill, a tool once reserved for professional technicians but now modified for home enthusiasts. This guide explores the multifaceted benefits of owning a nail drill, the intricacies of comprehensive starter kits, and the technical knowledge required to avoid common pitfalls and achieve a flawless finish.
Why a Professional Nail Drill is a Game-Changer for Beginners
For those just starting their nail art journey, the initial investment in a nail drill can seem daunting. However, the long-term advantages far outweigh the learning curve. A nail drill provides a level of precision and efficiency that manual filing simply cannot match. It allows for the rapid removal of old gel polish, the smoothing of callous skin around the cuticles, and the perfect shaping of acrylic extensions.
Breaking the Barrier: Ease of Use and Control
Modern entry-level nail drills are designed with the novice in mind. They often feature ergonomic “pen-style” grips that fit comfortably in the hand, reducing fatigue during long sessions. Manufacturers have focused on creating interfaces that are intuitive, typically involving a simple dial for speed adjustment and a toggle switch for rotation direction (Forward/Reverse), making them accessible for both right-handed and left-handed users.
Significant Cost Savings Over Salon Visits
The financial aspect is perhaps the most compelling reason to switch to DIY. A single professional manicure session, especially one involving gel or acrylics, can cost anywhere from $40 to $80. By purchasing a cost-effective nail drill set, users often find that the tool pays for itself within just two or three uses. Over the course of a year, this can lead to savings of over $1,000, which can then be reinvested into higher-quality polishes or advanced nail art accessories.

Key Features to Look for in an Entry-Level Nail Drill
Not all nail drills are created equal. When browsing for your first device, it is crucial to look beyond the price tag and evaluate the technical specifications that determine the tool’s performance and safety. A “bad shopping experience” often stems from choosing a drill that is underpowered or lacks the necessary safety features for delicate natural nails.
Variable Speed and Directional Control
A high-quality drill should offer a range of speeds, typically measured in RPM (Rotations Per Minute). For beginners, a range of 0 to 20,000 RPM is usually sufficient. Lower speeds (3,000-5,000 RPM) are essential for natural nail prep and cuticle work, while higher speeds are reserved for thinning out thick acrylics or removing hard gels. The ability to switch directions is equally important, as it allows the user to file away from the cuticle on both sides of the nail without awkward hand positioning.
Low Heat and Minimal Vibration Technology
One of the primary concerns for beginners is the heat generated by the friction of the drill bit. Advanced entry-level models utilize high-quality motors and aluminum alloy shells that dissipate heat effectively. Minimal vibration is also a key feature; excessive shaking can lead to “jumping” of the bit, which might cause accidental damage to the nail bed or surrounding skin. Look for drills that advertise “low noise” and “low vibration” to ensure a steady and comfortable experience.

The All-in-One Advantage: 57-Piece Sets and Integrated UV Lamps
For many beginners, the most efficient way to start is by purchasing a comprehensive kit. The 57-piece gel nail polish set, which includes a UV lamp and a nail drill, has become a gold standard for entry-level enthusiasts. These sets provide a curated experience, ensuring that every tool needed for a complete manicure is available from day one.
Understanding the Components of a Comprehensive Kit
A typical 57-piece set is not just about quantity; it is about providing a full ecosystem for nail care. These kits generally include:
- The Electric Nail Drill: The core tool for prep and removal.
- Interchangeable Drill Bits: Including needle bits for cuticles, cone bits for sidewalls, and large barrel bits for surface work.
- UV/LED Lamp: Essential for curing gel polishes and base/top coats.
- Assorted Gel Polishes: A range of colors to allow for creative expression.
- Nail Prep Tools: Such as separators, dust brushes, and manual files for finishing touches.
The Role of the UV Lamp in Gel Manicures
A nail drill prepares the canvas, but the UV lamp secures the art. Without a high-quality lamp, gel polish will not harden, leading to smudging and premature peeling. Modern lamps included in these sets often feature dual-light source technology (365nm + 405nm) to cure all types of gel products efficiently. Integrated timers (30s, 60s, 90s) prevent over-curing, which can make the gel brittle and difficult to remove later with the drill.

Mastering DIY Techniques: From Simple Shaping to Advanced Art
Transitioning from a novice to a proficient user requires practice and a systematic approach to nail care. The drill is a powerful tool, and understanding the mechanics of how it interacts with different materials is vital for both safety and aesthetic results.
Preparing the Natural Nail Plate
The most common mistake beginners make is over-filing the natural nail. When using a drill for prep, always use a fine-grit sanding band or a specialized cuticle bit at a very low speed. The goal is to remove the “shine” (natural oils) from the nail plate to improve adhesion, not to thin the nail itself. Keep the bit moving constantly; never let it rest in one spot, as this creates “fire rings” or painful heat spikes.
Handling Gel and Acrylic Removals Safely
Removing enhancements is where the nail drill truly shines. To remove gel polish, use a medium-grit ceramic bit. Ceramic is preferred by many because it generates less heat than metal bits. For acrylics, a coarser carbide bit may be used to bulk-reduce the material before soaking off the remainder. This method is much faster than traditional soaking and is more environmentally friendly as it reduces the amount of acetone required.

Avoiding Common Pitfalls and Ensuring a Positive Shopping Experience
While the market is flooded with affordable options, some products can lead to a “bad shopping experience” due to poor durability or misleading descriptions. Being a savvy consumer means knowing what to check before clicking “buy.”
Identifying High-Quality vs. Low-Quality Motors
The motor is the heart of the drill. Low-quality motors often produce a high-pitched whining sound and lose torque (power) when pressure is applied to the nail. A good entry-level drill should maintain its speed even when making contact with the nail surface. Reading user reviews specifically for “torque” or “stalling” can help you identify a reliable motor.
Maintenance and Sanitation Protocols
To ensure your nail drill lasts for years, regular maintenance is required. After every use, dust should be brushed off the handpiece and out of the motor vents. Bits must be sanitized using high-level disinfectant or an ultrasonic cleaner if used on multiple people. Proper care not only extends the life of the tool but also prevents nail infections, ensuring your DIY experience remains healthy and enjoyable.
| Feature | DIY Home Nail Drill | Professional Salon Visit |
|---|---|---|
| Initial Cost | $30 – $100 (One-time) | $40 – $80 (Per session) |
| Time Commitment | Flexible, at your own pace | Requires appointment & travel |
| Customization | Full control over design/speed | Limited by technician’s style/time |
| Hygiene | Personal tools, zero cross-contamination | Dependent on salon standards |
| Learning Curve | Moderate (Requires practice) | None (Professional service) |
Frequently Asked Questions (FAQ)
- Q1: Is a nail drill safe for natural nails?
- Yes, a nail drill is safe for natural nails provided it is used at low speeds (under 5,000 RPM) with the correct bits. It should only be used to remove the surface oils or gently push back cuticles. Avoiding heavy pressure and keeping the bit in motion are the keys to preventing damage.
- Q2: Why does my nail drill get hot during use?
- Heat is usually caused by friction. This happens if you stay in one spot too long, use a dull bit, or apply too much pressure. High-quality drills with aluminum shells help dissipate this heat, but the user must also use proper technique to minimize friction-related discomfort.
- Q3: Can I use a beginner nail drill for acrylic nails?
- Absolutely. Most beginner drills reaching 20,000 RPM are powerful enough to shape and thin acrylic nails. However, for full removal of thick acrylics, you may need to work in stages to avoid overtaxing the smaller motor found in entry-level “pen-style” drills.
- Q4: Do I really need a 57-piece set?
- While not strictly necessary, a 57-piece set is highly recommended for beginners because it eliminates the guesswork. Having the UV lamp, specific drill bits, and a variety of polishes in one package ensures compatibility and provides everything needed to complete a professional-looking manicure immediately.
- Q5: How often should I replace the drill bits?
- Sanding bands are single-use and should be discarded after every manicure. Metal or ceramic bits can last several months to a year depending on frequency of use. If you notice the bit is taking longer to remove material or requires more pressure, it is time for a replacement.