Introduction: To easily get salon-level curly hair, you only need the right “tool”
Tired of the daily grind of straight hair, but afraid of the complexities and burn risks of manual curling tongs? The advent of automatic curling tongs is undoubtedly a boon for the hairdressing world. They promise to simplify the complex curling process to a single click, allowing anyone to achieve salon-quality styling at home.
But even a seemingly simple automatic curling iron requires mastering some key techniques to avoid setbacks. From choosing the right tool to detailed steps and precautions, this article provides a complete beginner’s guide . We’ll break away from the conventional step-by-step instructions and delve into the underlying principles, helping you understand not only the how but also the why, allowing you to truly master your style.
Choose the right tool: your “magic wand”
Before you begin your curly hair journey, choosing and preparing your tools correctly is the first crucial step to success.
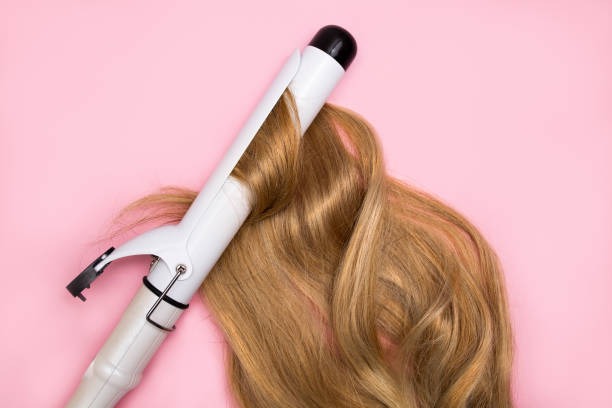
1. Curling iron size: Why is 32mm the most popular size?
There are various sizes of automatic curling irons on the market, ranging from 25mm to 38mm. But why do many people recommend 32mm ?
25mm : It can create very tight and elastic curls, but if it is not done properly, it can easily look too old-fashioned or like a “ramen head”.
38mm : It can create very natural waves, but for people with less hair or fine hair, the curls may not last long.
32mm : Considered the most versatile and versatile size . It creates natural, voluminous waves without being overly dramatic, yet providing ample volume. It’s suitable for most hair types and face shapes, perfect for everyday wear or special occasions.
Therefore, if you are trying it for the first time, a 32mm automatic curling iron is definitely a foolproof choice.
2. Hair care products: “base cream” before curling hair
a hair oil or heat-blocking spray before styling your hair is crucial. These products create a protective layer for your hair, effectively protecting it from heat damage while adding shine and smoothness. Skipping this step can leave your hair dry, frizzy, and even split ends.
The Science of Perfect Curls: Temperature, Zones, and Styles
The secret to successfully curling your ideal hairstyle lies in mastering three core elements: temperature, zone and setting .
1. Find your “exclusive temperature”
Different hair types have different tolerance to heat, and choosing the right temperature is the key to protecting your hair and ensuring the best curls.
Fine hair : naturally fragile and easily damaged, suitable for using lower temperatures of 150°C-180°C .
Normal hair : Most people’s choice. It is recommended to start from 180°C-190°C .
Coarse and hard hair : Strong hair requires a higher temperature to effectively shape it. You can choose 190°C-210°C .
2. Precise zoning: Let every strand of hair “enjoy” even heating
Don’t try to curl too much hair at once. A very practical way to divide your hair is to divide it into two layers, the top and the bottom, and then divide the bottom layer into two parts, the left and the right.
Small bunch principle : Take a small bunch of hair at a time, no larger than the width of the curling iron plate . This not only ensures that each bunch of hair can be fully heated, but also makes the curls more uniform and lasting.
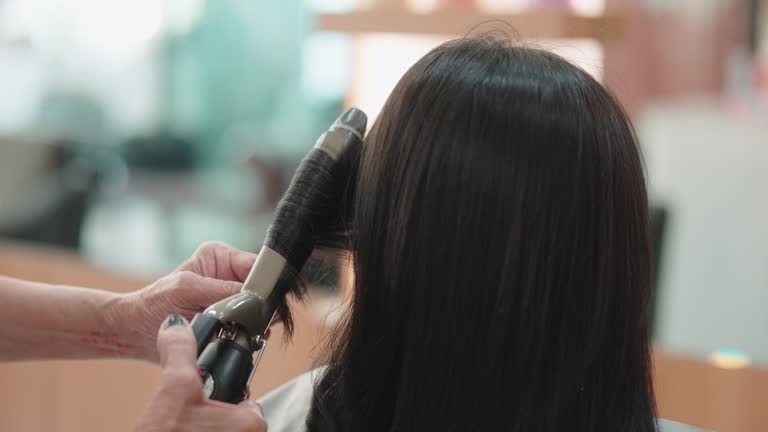
From bottom to top : Start curling from the lower layer of hair. After processing all the partitions, put down the upper layer of hair. This will greatly improve efficiency and avoid missing curls.
3. Time and Form: Shaping and Locking
Hold time : Generally, it is recommended to hold for 10-15 seconds . Automatic curling irons usually have a beep, and you can release it after hearing the beep.
Cooling and setting : This crucial step is often overlooked. Freshly curled hair is very hot and its structure is still unstable. It’s crucial to let your curls cool naturally until they’re completely cool. This is how the curls are truly locked in. Prematurely fiddling with your hands will only cause the curls to quickly loosen.
Use styling products : After cooling, spray with a setting spray or apply wax to keep your curls in place all day.
Frequently Asked Questions and Advanced Tips
1. Why don’t my curls last?
Your hair isn’t dry enough : If there’s still moisture in your hair, the heat from the curling iron will evaporate the moisture instead of shaping it. Make sure your hair is completely dry, ideally 90% dry.
Too much hair : The hair strands that are curled each time are too thick, which results in the heat not being able to penetrate and the hair inside is not curled.
Lack of setting : Not using a setting product is like applying perfect makeup without using a setting spray.
2. How to avoid “heat damage”?
Control the temperature : Again, find the temperature that suits your hair type.
Use hair products : Use heat protection spray or hair oil before each styling process.
Repair regularly : Use a hair mask or deep conditioner weekly to replenish nutrients and repair heat damage.
3. Advanced Techniques: Creating a More Natural Look
Hair end treatment : For those hair ends that are prone to looseness, you can increase the dwell time appropriately, or use styling products to strengthen them before curling.
Bangs : Bangs are an important part of shaping your face. Use a curling iron to gently pass through them, just create a natural arc instead of a hard curl. This will make your overall shape look softer and more natural.
Conclusion: Confidence comes from the control of details
Achieving beautiful curls not only transforms your appearance but also boosts your confidence. Automatic curling irons make this process easier than ever, but true beauty comes not from the tools themselves but from your attention to detail. From choosing the right tool to mastering temperature, zone settings, and hold, every step holds the secret to achieving the perfect look.
Now that you’re armed with this knowledge, are you ready to start your curling journey? Do you have any questions about automatic curling irons? Or do you have any insider tips to share? Feel free to share your thoughts in the comments section.