Have you ever had this experience: you spend countless hours in front of the mirror, carefully styling your hair with a curling iron, only to find that the curls are loose, fall apart after a short time, and even look extremely frizzy?
You might think that a curling iron is all you need to create a perfect look. But the art of curling hair is much more than that. It’s a complete system, from the moment you walk into the bathroom to the last step before leaving. Every step is crucial. Skipping any one step could undo all your efforts.
Wondering how to achieve long-lasting, shiny, salon-perfect curls? This ultimate guide, from shampoo to styling , reveals every crucial step.
Step 1: Wash and prepare – create a healthy “canvas”
Any beautiful look starts with healthy hair. Build a solid foundation for your curly hair journey by starting with proper care.
Choose the right shampoo : If you have oily hair, choose an oil-controlling, refreshing shampoo; if you have dry hair, choose a nourishing, moisturizing shampoo. A healthy scalp is the key to a voluminous hairstyle.
Use conditioner correctly : Apply conditioner only to the ends of your hair and avoid the roots. Otherwise, residue may weigh your hair down and affect the volume of your curls.
Deep conditioning : Use a hair mask once a week to provide deep nourishment to your hair, repair daily heat damage, and make your hair resilient and more resistant to damage caused by high-temperature styling.
Step 2: Blow-dry your hair – prepare it for styling
This is where many people make mistakes, but it is crucial to the final result.
Golden rule: Never use a curling iron on wet hair : The combination of heat and moisture can cause severe “steam damage” to your hair, leading to dryness, frizz, and even breakage. Make sure your hair is completely dry before you start styling .
Blow-drying tips : Use a hair dryer to blow your hair until it is 80% dry, then use a comb to help blow the hair smoother. This will lay a smooth foundation for subsequent curling work.
Step 3: Protection before styling – your “safety barrier”
This step is key in determining whether your hair will become frizzy and damaged.
Use heat protection spray : Before you start curling your hair, evenly spray a layer of heat protection spray (Heat Protectant Spray) . This is like putting a fireproof coat on your hair, which can create a protective barrier between the hair and the high temperature, effectively reducing heat damage, while making the curls last longer.
Wait for absorption : After applying the heat protection spray, wait one to two minutes for it to be completely absorbed into the hair to ensure that every hair strand is protected.
Step 4: Formal Curls – Master Your “Art Tools”
Now, you are fully prepared for curling your hair.
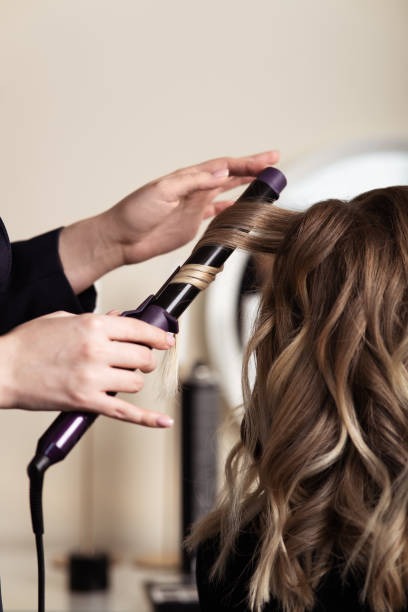
Layered curls : Divide your hair into four sections, top, bottom, left, and right, and secure with hairpins. Curl only a small section of hair at a time to ensure more even curls, better heat absorption, and longer-lasting results.
Control the temperature and time : Find the optimal temperature for your hair type. Generally, fine hair should use a lower temperature (150-180°C), while coarse hair can choose a higher temperature (180-200°C). Keep each curling session to no more than 10 seconds to avoid heat damage.
Master the curling technique : Place the curling iron in the middle of your hair and twist it inwards or outwards, bringing the ends and roots into the curler as well.
Step 5: Setting and finishing – keep beauty all day long
The final step is to keep your beautiful hair looking great all day long with a healthy shine.
Cool and hold : After curling a section of hair, don’t put it down immediately. Hold the curl in your hand and let it cool for a few seconds. This will help the curls hold better and last longer.
Use styling products : After all hair is curled, use a styling spray or hair gel and spray evenly from about 20-30 cm away from the hair.
Essential Oil Blessing : Finally, warm a small amount of hair oil in your palms and gently massage it into your curls. This provides extra nourishment, smooths frizz, and adds shine.
Conclusion : Perfect curls aren’t accidental; they’re a complete “system.” By following these five steps, you’ll say goodbye to frizzy, flimsy curls and easily achieve healthy, beautiful, flawless hair. The next time you pick up a curling iron, remember that you’re creating a work of art from head to toe.
Which step do you often overlook? Share your experience in the comments!